Tuesday, November 22, 2011

Simplicity 1952 Baby Backpack

I recently cut out all of the teeny tiny pieces for baby doll clothes and a baby backpack.  My plan was to make the backpack and some clothes for my youngest to go along with the Bitty Baby that we are going to get her for Christmas.  One part of the plan has been accomplished.  The backpack is finished and I am ecstatic with the results!!!


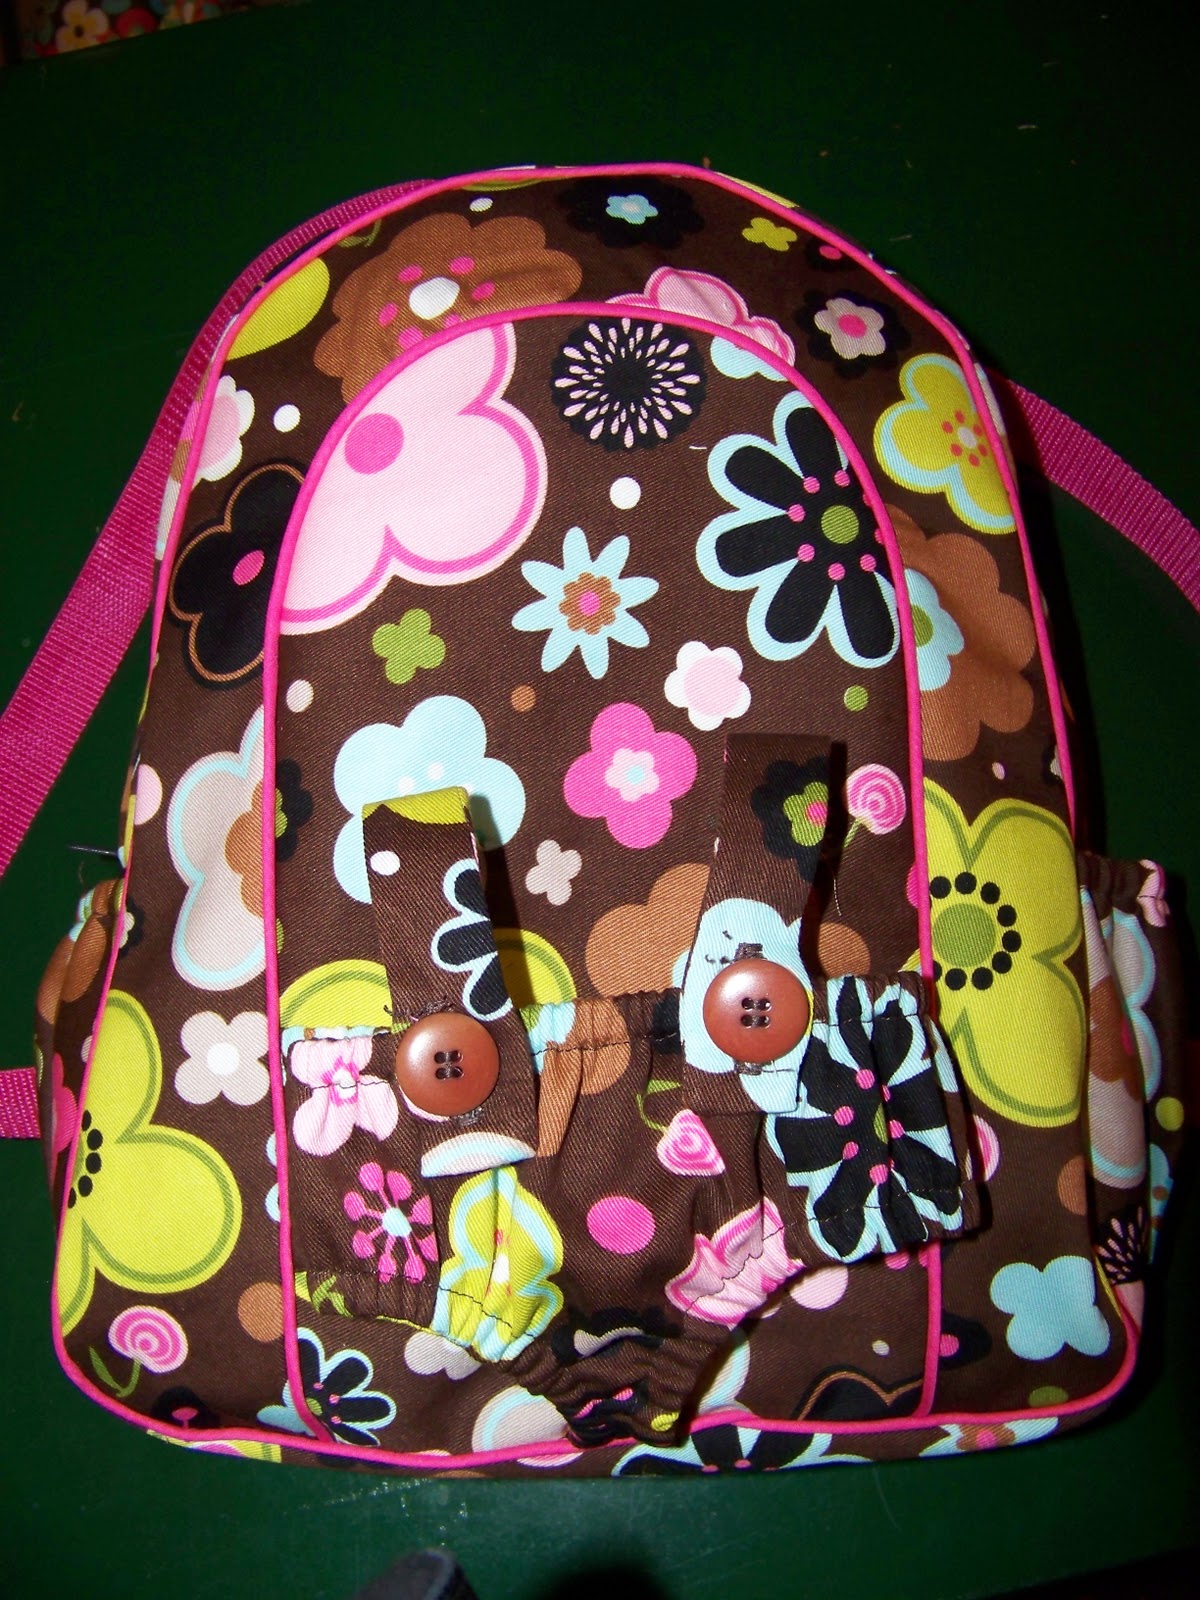
The cording was my major concern.  If you don't catch it just right, it doesn't look right.  Well, I lucked out (with my cording foot) and it looks great!  Can you see the bottle pockets on the side of the bag?


I do believe this is my best zipper yet.  It is totally hidden and works like a charm.  The webbing for the straps was stolen from another bag I am planning to make for one of the teenagers.  I forgot to buy the webbing when I was purchasing the rest of the materials (go figure).


As you can see the baby fits snugly in the carrier and there is plenty of room in the bag for any clothes I will make for the baby.  Thank you to Shelby for being a good sport and modeling the bag for me. 

This bag was challenging, but I learned several things while making it.  Reading the pattern and understanding what is being said requires me to reread the directions several times.  Sometimes even after multiple readings I just have to try it out and hope for the best.

I can't wait to give this to my daughter for Christmas.

Heather

Friday, November 18, 2011

Infinity Scarf

I have seen many Infinity scarves around the blogs I read lately.  They appeared to be easy to sew and super cute.  Imagine my excitement when Craftiness Is Not Optional posted a tutorial for making an Infinity Scarf yesterday, here. 

This meant an emergency stop at JoAnn Fabrics on my way home from work.  I don't often (never) work with knit, so there wasn't any laying around my house.  While there, I bought enough knit to make 3 scarves and the fabric to make the baby doll backpack. 

From there I rushed right home to start on the scarf.  After dinner and play time with the kiddos, I was able to get the scarf together pretty quickly.  I can't wait to wear it to work next week!


Heather

Thursday, November 17, 2011

Pattern Cutting for Simplicity 1952

There is a reason that Quilts are my favorite thing to sew!  I seriously dislike cutting out pattern pieces.  That being said, my evening was spent cutting out pattern pieces for Simplicity 1952.  The pattern is for clothes and a backpack for 15" dolls.  We are planning to buy one for the youngest for Christmas.

The hand cramps, from all the cutting, are affecting my ability to type!  This pattern has 24 pieces and most are very small with many notches to cut.  It will all be worth it when she opens up the doll clothes and backpack for her baby on Christmas morning. 


Look at all those little pieces.  I am really enjoying making clothes, but also looking forward to the squares, rectangles and triangles of quilting. 

Heather

Wednesday, November 16, 2011

Rule Breaking Quilts

I took a class with a friend of mine at a local quilt store for fun.  The class taught us about the techniques in the book Rule-Breaking Quilts by Kathryn Schmidt.  It was a very freeing experience, no measuring, no pattern, no master plan.  Just a few fabrics, a rotary cutter, and a sewing machine. 

If things didn't line up, just cut them off or add a little bit to them.  One great technique I learned was how to cut and sew together long free curvy pieces.  This was accomplished by overlapping the fabrics, cutting the curve and then sewing them together.  It worked great.


As you can see the quilt is still not finished.  My friend has already incorporated her pieces into a quilt, which she has had quilted and given to her daughter.  This makes me think this project should move into the finish soon category. 

This book was a great read, since the author has a wonderful sense of humor.  These techniques will definitely teach you about yourself as a quilter/sewer.  I learned that, while it is fun to let go of the rules and pattern sometimes, I really like to follow the rules.  Knowing how much fabric I need, what the finished project will look like and having a plan of attack, is what I am comfortable with.

I am hopeful that this will become a wall hanging for my "little girls" bedroom (soon).

Heather

Tuesday, November 15, 2011

Fleece Flower Hair Bows

Today brings more hair bows.  This will be a tutorial in how to make them.

Supplies Needed:

Fleece scraps (at least 7 inches long)
Felt scraps
Hair clips
Hot glue gun
Needle
Thread to match the fleece

1.  Cut 2 strips of fleece 2" by 7".


2.  Fold the strips in half and sew with a 1/4" seam allowance.


3.  Snip the fleece strips about every 1/4" to create the loops, being careful not to cut the stitching.


4.  Roll the first 2" tightly and tack (stitch) in place.


5.  Make a long basting stitch for 2" pull, like making a gather.  Wrap the gathered section around and tack in place.   Repeat until the flower is finished.


6.  Tie off the thread in the center.

7.  Measure the bottom and cut a piece of craft felt about the same size.  Mine measured 1", so I cut a square at that size and then rounded the corners.

8.  Fold the felt circle in half and cut 2 small slits to slip the hair clip through. 


9.  Hot glue the felt to the hair clip.

10.  Finally, hot glue the fleece flower to the felt.


You end up with beautiful fleece flowers, perfect for any little girl!

Heather

Monday, November 14, 2011

Simplicity Skirt 2226

I never sew clothes for myself!  One of the blogs I follow, Noodlehead, had a sew along last week.  While I don't have time to do this during the week due to my hectic life, I decided to try it out this weekend.  The whole time that I was sewing, I fretted about my fabric choice.  The fabric was a little more busy than I would normally chose for clothing.

As suggested, I made a sample waistband from muslin.  This told me that I needed to make a size 14.  Even though I was a little upset by the number, it was important that the skirt fit, so a 14 it was.  This tutorial was great!!  The steps were super easy to follow and the illustrations were incredibly helpful.

When the skirt was together and I put it on, I discovered that it was WAY too big.  Urgh...now it was time to employ my newly acquired alterations skills.  It was necessary to trim 1 1/2" from each side to make it fit properly. 


After much fretting and a little frustration about sizing, I love the skirt.  So does my 17 year old daughter.  That could be because I borrowed her shirt and sweater to wear with it, but she wants me to make her one (success)!

Saturday, November 12, 2011

It's a Wrap Fabric Bowl

After yesterday's fabric hot plate, I just knew I had to make a bowl.  So as soon as one project was finished I was in the laundry room digging through my scraps.  I found a promising looking wad of fabric left over from a scarf I made a few years ago.  The fabric matches my bedroom, how convenient!


Voila!  Finished bowl, perfect for putting my cell phone charger, Kindle charger and cell phone in at night. 


I put my keys inside the bowl to show the size of the bowl.

Now, I just have to clean off my dresser so there will be a place to put this fabulous bowl.  This is a small round bowl from the book It's a Wrap!  Off to start my next project!

Heather

Friday, November 11, 2011

It's a Wrap! Hot Plate

Lately I have been wanting to make fabric wrapped bowl.  Well, I wasn't quite feeling the bowl yesterday, so I decided to make a hot plate instead.  I had all of the supplies necessary for completion.  That was nice for a change. 

A few years ago, I took a class at my local quilt store and learned how to make a wrapped fabric bowl.  It was a great day spent with my sister-in-law.  We both came home with a fabric bowl. 

I used the leftover clothes line from the class and some fabric left over from another project. 


One of the really nice things about this project is that the strips don't have to be cut exactly.  Just cut somewhere between 1/2" and 3/4". 


Then wrap, wrap, wrap and pin as you go.  Another thing to love about this fabric, is that you can use up some of the small scraps that are left over at the finish of a project.


Presto!  One nifty place to put a hot pot to keep the counters and table safe from the heat!

I had so much fun making this one, I do believe that I can feel a bowl coming soon.  This project came out of the book It's A Wrap by Susan Breier.

Heather

Thursday, November 10, 2011

Yo-yo Hair Bows

I spent an afternoon, not to long ago, making yo-yos.  The intention was to make them into hair bows.  Well, with my crazy life, it has taken me awhile to finish the project off.  After many cross country meets, work days and a little procrastination, here they are!


Finished clips.  There are two of each.


The backside.


The clips easily attach to a headband.

One little piece of advice:  If your buttons have a top and bottom, make sure to test out the placement with the clips facing opposite directions, like they will be in the hair.  This will help to make sure the buttons are facing the right direction when they are in the hair.

I found the tutorial to put these together at Craftiness Is Not Optional, found here.  While perusing the blogs that I follow, these hair bows caught my attention.  In a house with 4 daughters, hair needs to be accessorized.  I used a Clover yo-yo maker to whip these up.  It looked like I was having so much fun that my 8 year old, Francis, decided to play along.  She was easily able to put together a set of these and had a lot of fun doing it!

Heather

Wednesday, November 9, 2011

Finished Dress!

The dress is finished!  I think this must be the quickest finish on a piece of clothing for me.  Despite my busy evening, I was able to finish the arm hole, hem the dress and attach the hook and eye.

When I got home from work, I finished the arm hole and retaught myself how to blind hem.  Luckily I save everything, including the tutorial packet from when I purchased my first sewing machine.  That was the last time that I used the blind hem stitch on my sewing machine.  Wow, was that a fast hem.  Why do I dread them so much, not anymore. 


Finished arm holes and neckline.  I used single fold bias tape, super easy!

After returning home for the evening, I attached the hook and eye to the top of the neckline, so the top will stay closed throughout any play session.


Finished front.


Finished back.

All that is left now is to wash the markings out!

This dress helped me to conquer two of my biggest fears:  zippers (in clothing) and hemming.  I will no longer allow zippers to send me running from a pattern that I love.

Heather

Tuesday, November 8, 2011

Little Pink Dress - Simplicity 2483

I began working on a little pink corduroy dress for Genavieve this Monday (Simplicity 2483).  On day one I cut out the fabric, sewed the front pin tucks and pockets on.  This is the point where I ran out of thread.  URGH! 

Day two started with an emergency stop for thread at my local quilt store on my way home from work.  After all of the normal evening duties, I was able to put in the zipper, finish the seams and complete the collar. 

All that I have to do tomorrow is get the 2nd armhole finished and the hem. 

The zipper was really exciting for me, yes you read this right.  I said exciting!  Last month I took a Prom Dress Techniques class at a 4H workshop.  During this class, I learned how to put in a hidden zipper.  The opportunity to practice on a simpler fabric was wonderful!  Successful installation of a hidden zipper.


Can you see it?


There it is!

The dress had tucks at the top, along the collar.  Tucks are not something that I had tried before.  They were really simple to sew, adding some interest to the collar.


These will be super cute once I wash out the marker.

I am learning new things about sewing, whether for quilts or clothing.  Quilting is my favorite thing to do, but most of the quilting going on here at the moment is for Christmas presents.  Those projects will be posted later, so the recipients are surprised! 

Hope to have the dress finished tomorrow, but we will see what my busy life has in store for me.

Happy Sewing!
Heather